By Antonio Garcia May 21, 2024 6 min
There are instances when you may need to export your Sage 50 data to Excel. But what if you notice that the Sage export to Excel not working? It can be utterly annoying for users when such an error occurs while they are in the middle of an important task. The error often occurs when there is an improper integration of the Sage 50 application with MS Excel.
There can be several other possible reasons as well that are stopping the export of the Sage 50 data to an Excel sheet. Knowing the possible reasons can facilitates users with finding the right troubleshooting procedures for Sage 50 won’t export to Excel error.
Here, we will discuss the common reasons behind the error and solutions that can override these factors promoting the problem in Sage 50. Keep reading to know more!
Table of Contents
ToggleThere are various reasons that can interfere with the export of Sage 50 data to Excel, as mentioned in the following list:
Sage 50 stores the crucial financial information of a company and enables data sharing with other users. However, it is not possible to provide Sage 50 access to all the employees. However, if someone needs to analyze the reports or financial data from Sage 50, exporting to Excel can be a feasible solution to it.
Sage 50 export to excel feature enables users to move the accounting data into MS Excel. However, if an error occurs during the process, you need to resolve it immediately. The next section explains some of the most effective measures you may take to eliminate the hurdle.
Also Read: Sage Pay Error 4020 Invalid IP
Now that the factors interfering with the export are not unfamiliar, we can advance with the troubleshooting procedures explained in the following sections:
It is a prerequisite to run Sage 50 as an admin to export the program data to Excel. You can get it done with a couple of easy steps.
If the error continues, try the next method.
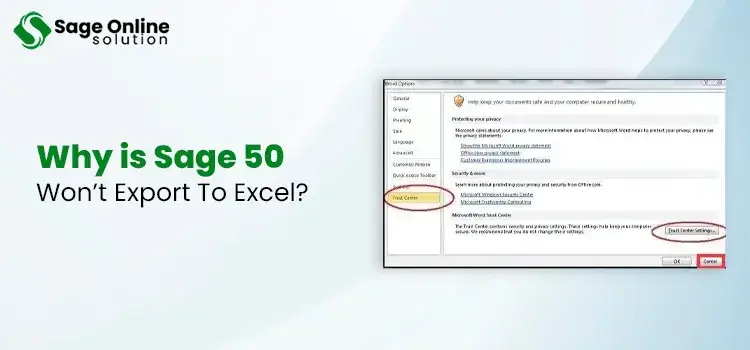
The Trust Center settings can block data sharing from other external applications to MS Excel. The Sage 50 won’t export to Excel error can also occur due to the same. Therefore, to prevent this error, you need to check and modify the settings and prevent it from causing the export error:
When you make any changes or update MS Excel, it can evoke compatibility issues with other applications. Restoring it to the default settings can prevent the error. Therefore, you can do it by following these steps:
If you are having trouble opening the new worksheet in MS Excel, you can change the default view for the new sheet by executing these steps:
Integrating Sage 50 with MS Excel can offer you numerous benefits. However, you need to make sure that they are compatible with each other. Below is how you can check and rectify it:
A partial or damaged installation of MS Excel can make it prone to a wide range of technical issues. Sage 50 export to excel not working can also be one of these errors. In such a case, you can manually register or install the MS Excel:
Also Read: Migrate From Sage 50 to Sage Intacct
The common reasons why Sage 50 won’t export to Excel are explained to you so that you can resolve the error on your own. However, it is crucial that you export the Sage 50 data to Excel in the correct way. Check the below-given steps:
This post explains some of the solutions to resolve the issue with Sage 50 export invoice to Excel process. Besides, it also explains the correct process to get this task accomplished. If you are facing any kind of difficulty with the procedure, you are advised to contact help from Sage 50 Help Desk. The trained technicians can assist you with one-on-one assistance over helpline or chat.
What are the common reasons for Sage 50 won’t export to Excel?
There can be several possible reasons why Sage 50 not exporting to Excel issue, such as compatibility issues between the two applications, improperly configured settings, improperly installed MS Excel and more.
How do I export reports from Sage 50 to Excel?
Below are the steps to export reports from the Sage 50 application to MS Excel:
What are the benefits of Sage 50 integration with MS Excel?
Sage 50 integration with Excel lets you run Excel spreadsheets directly with the components of the Sage accounting application. Besides, you can organize your data, use logical spreadsheets, and use charts. However, before you link Excel with Sage 50, you need to configure your data file to run smoothly in the cross-platform functionalities.
How to make Sage 50 integration with Excel work?
If you want to harvest the incredible benefits of Sage 50 and Excel integration, make sure that the two apps are compatible and their settings are not interfering with the exchange of data between them.
How do I get help for Sage 50 export to Excel error?
If you need help with the Sage 50 won’t export to Excel issue, you may contact the Sage customer service team and get help from a live support representative over call or chat. They can resolve your issues and answer your product-related queries.
About The Author

Antonio Garcia
Antonio Garcia writes for Sage Online Solution and helps businesses manage their financial books more effectively. He offers practical advice and solutions that simplify accounting software use, so companies handle their finances with ease and accuracy. With years of experience, Antonio understands what businesses need to succeed. He aims to make accounting less stressful for everyone.
Feb 19, 2026
Feb 18, 2026
Feb 16, 2026
Feb 16, 2026
Feb 13, 2026
© Copyright 2026 Sage Online Solution | All Rights Reserved
For US Helpline +1-844-341-4437
For UK Helpline +44-800-810-1881

